Biofilm in food processing is a surface-associated community of microorganisms within an attached matrix. On machinery, retained food and moisture can support its development in places routine cleaning does not reach. A slimy deposit may justify investigation, but appearance alone cannot identify a biofilm, a particular organism or a safe surface.
Start with the equipment sanitation framework and release checkpoints. This troubleshooting guide focuses on persistent machinery niches: where to inspect, which evidence answers which question, and when cleaning changes must be accompanied by repair or redesign. It is not a validated removal recipe or authority to release product.
Where biofilm forms on machinery: inspect the hidden interface
A harborage point is a location where contamination survives routine cleaning. A crevice is a narrow gap; a dead space is a poorly reached region that can retain soil or liquid. Product-contact surfaces touch food. Splash-zone parts receive food or cleaning spray and can transfer contamination without intended direct contact.
| Machinery location | Retention mechanism | Safe inspection or evidence check | Engineering response to assess |
|---|---|---|---|
| Threads, washers and mounting faces | Food and water retained between overlapping surfaces | Inspect below the head and at the frame interface, not only the visible bolt | Sealed, cleanable joint with specified installation |
| Worn seals and gasket grooves | Cracks, extrusion or lost seating expose hidden pockets | Record seal position before removal; inspect both groove and mating face | Compatible replacement compound and correct compression |
| Rough welds, pits and folded surfaces | Defects retain deposits beyond an accessible surface clean | Inspect continuity, undercuts, corrosion and trapped material | Qualified surface repair or replacement, then verify cleanability |
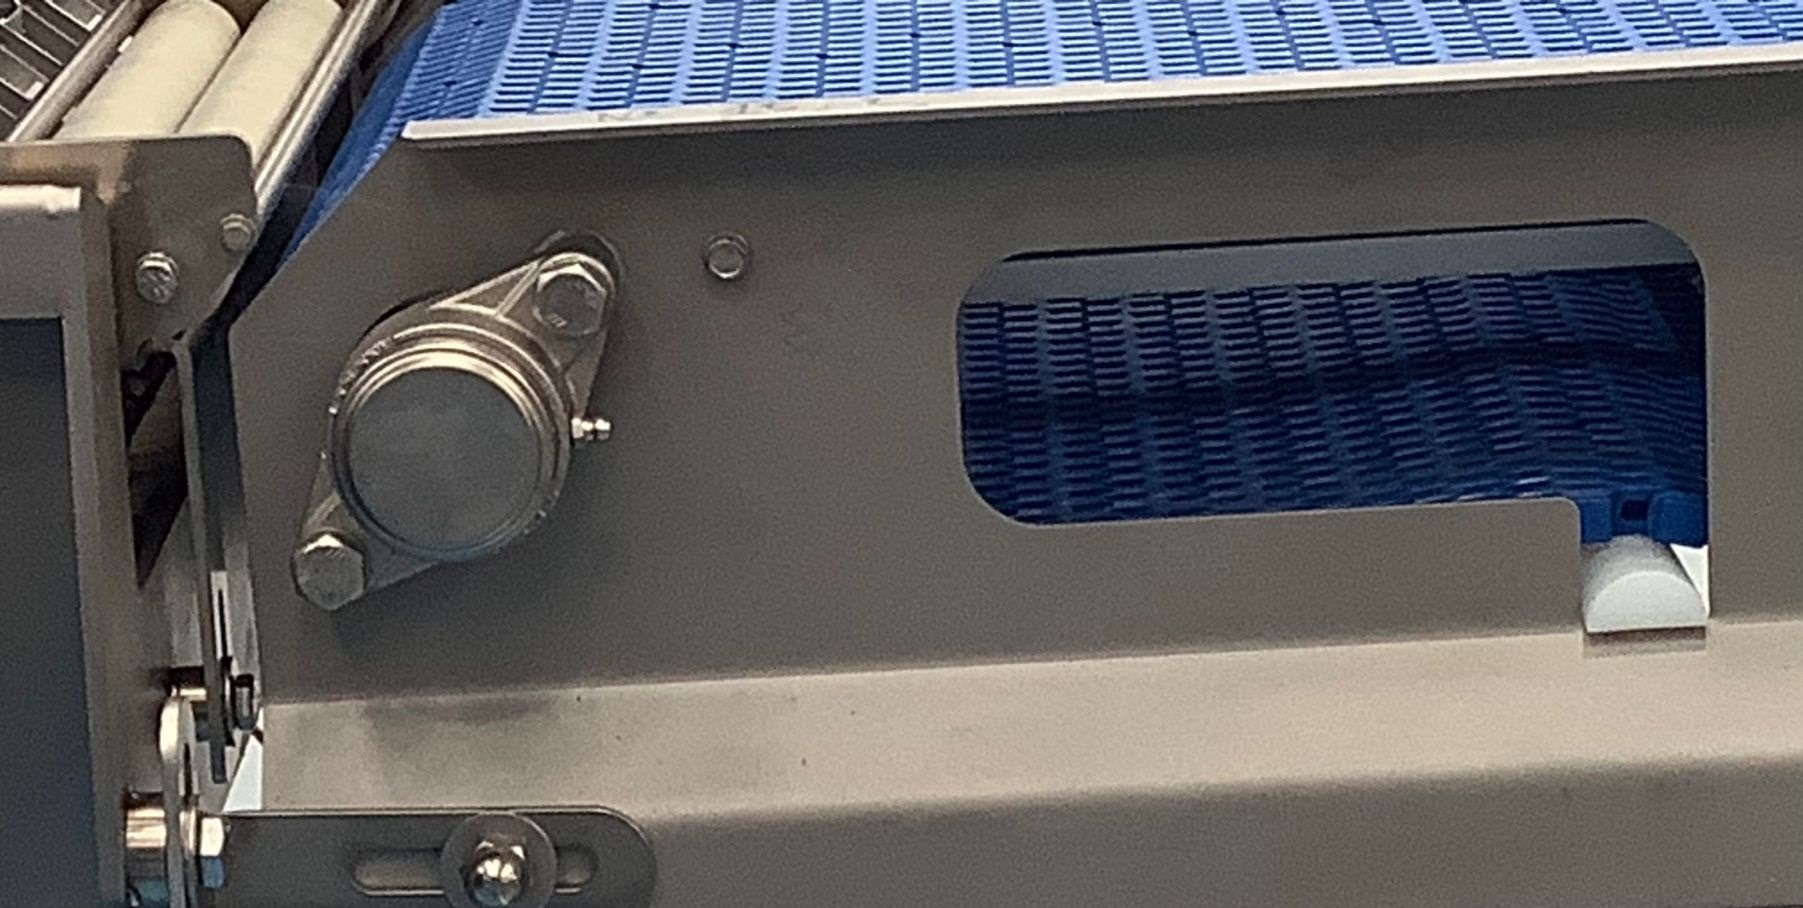
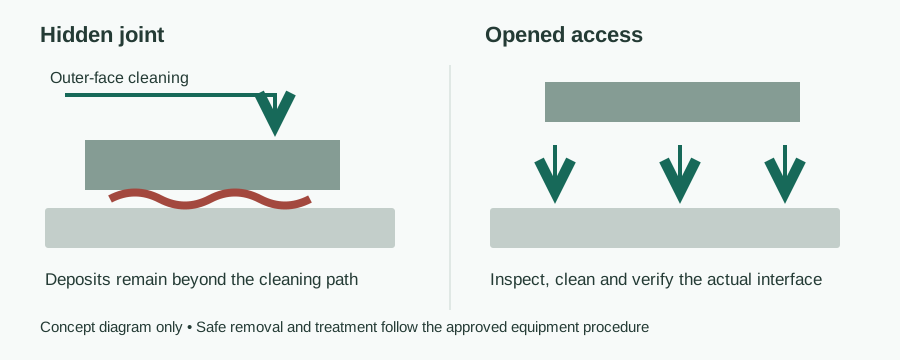
| Covers and bearing-to-frame joints | Exterior looks clean while the back face remains wet or soiled | Open only under approved isolation and removal instructions | Provide inspectable access, intact seating and drainage |
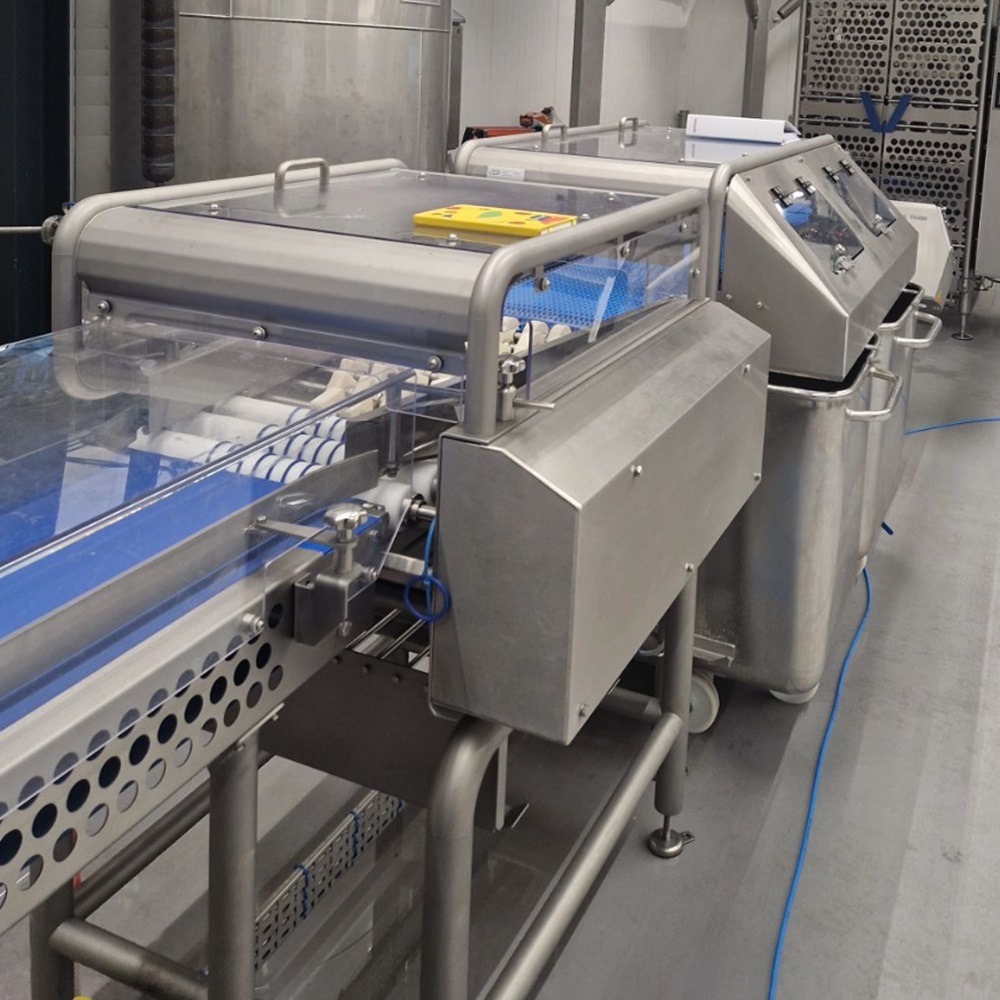
| Conveyor underside and return-path fittings | Deposits accumulate outside the normal operator sightline | Map underside, scraper mount and guard interfaces | Cleaning access and protected restoration of removed parts |
| Pipe branches and valve interfaces | Inadequate circulation or retention beyond the intended cleaning boundary | Review circuit drawings and actual cleaning coverage | Correct the flow path, drainability or dismantling requirement |
Send your application data and get a component recommendation
Inspect the installed assembly rather than a detached component photograph. A smooth housing can still have an inaccessible mounting crevice. A flush seal can become a soil trap if fitted incorrectly. Use the migrated installed cleanability and access checklist to decide whether every relevant surface can actually be reached, cleaned and inspected.
Prioritise the path toward food: dripping overhead joints, tools touching a dirty underside and then a product-contact surface, or runoff from a contaminated support. Floor-level levelling feet and castors need attention where liquid accumulates; they are not harmless merely because they do not touch food.
Why standard cleaning can miss a biofilm niche
The problem may be insufficient access rather than insufficient chemical strength. Detergent applied to the outside of a cover does not establish cleaning underneath it. An attached matrix and retained soil can limit treatment effectiveness, while a damaged joint repeatedly replenishes the protected location. Cleaning removes deposits; sanitising treats appropriately cleaned surfaces under specified conditions.
Review actual operation against the approved procedure: parts removal, delivery, mechanical action, concentration, temperature, contact time and rinsing. Check whether those conditions reached the difficult location, not just whether dosing equipment ran. Do not infer cleaning coverage from foam appearance, a shiny surface or a completed cycle record alone.
For internal systems, use the CIP coverage and COP reassembly checks. CIP means cleaning in place; COP means cleaning out of place after removal. Neither cleans an omitted interface automatically. A seal or fitting changed during maintenance can create a new cleaning boundary that the original procedure did not assess.
Increasing water pressure can spread contamination or drive liquid into a seal without removing the niche. Avoid spraying contamination from drains toward equipment. Water may be inappropriate in a low-moisture area: obtain an approved containment, drying and restart plan before introducing it. More aggressive treatment also needs component compatibility review, not just a hygiene objective.
Detection: distinguish residue, microorganisms and biofilm evidence
Use a question-led sampling plan agreed with QA and the laboratory. Record asset, point identifier, zone, sampling stage, defined area or interface, collection method and analysis. Inspect and photograph relevant condition without compromising sampling or worker safety. Coordinate sampling before disturbance when the investigation needs evidence of the original condition.
| Evidence | What it contributes | What it cannot establish alone |
|---|---|---|
| Visual inspection | Visible deposits, damage, drainage and access failures | Organism identity, absence of pathogens or confirmed biofilm |
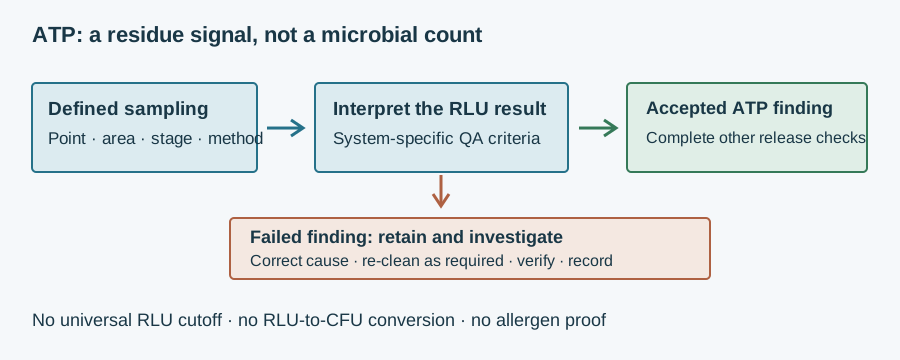
| ATP swab | Rapid indicator of recovered biological residue | Microbial count, Listeria identification or biofilm clearance |
| Environmental microbiology | Detection of the target or indicator under the specified method | Absence everywhere, or proof that detected cells were in a biofilm |
| Specialist surface or matrix examination | Additional evidence of attached communities where appropriately applied | Whole-machine clearance or a universal plant release decision |
| Point-level history and interface inspection | Recurrence pattern and plausible retention mechanism | Proof of one source without investigating reintroduction |
The ATP method and limit-setting guide explains why relative light units are system-dependent and not colony counts. A low ATP result does not override a pathogen finding. A negative microbiological sample applies to the collection and analytical method at the sampled point; inaccessible material or intermittent shedding can limit what it shows.
Include hidden interfaces and nearby transfer routes, not only convenient panels. Define routine points and justified investigation points separately. Preserve failed findings and subsequent actions. Repeatedly swabbing until one result is negative, or moving a point to a cleaner nearby surface, obscures the question rather than resolving it.
Listeria biofilm on equipment: persistence is not a diagnosis
Listeria monocytogenes is an environmental pathogen that can persist in processing environments and contaminate food. Repeated detections warrant investigation of harborage, cleaning implementation and transfer routes. They do not by themselves prove biofilm formation: ongoing reintroduction from materials, personnel, tools, water or adjacent equipment is another possibility.
QA should determine product disposition, environmental investigation and escalation under the food-safety plan. Maintenance should supply interface drawings, recent changes and safe access. The laboratory should advise on recovery, target methods and interpretation; strain comparison may contribute to a specialist investigation but is not a simple substitute for tracing the source.
For US human-food facilities within scope, 21 CFR 117.165 addresses environmental monitoring when contamination of ready-to-eat food with an environmental pathogen is a hazard requiring a preventive control. The written procedures identify organisms, sites, timing, frequency, methods and corrective actions as applicable. This is not a universal swab schedule for every food or pharmaceutical facility.
How to remove biofilm: a controlled corrective-action sequence
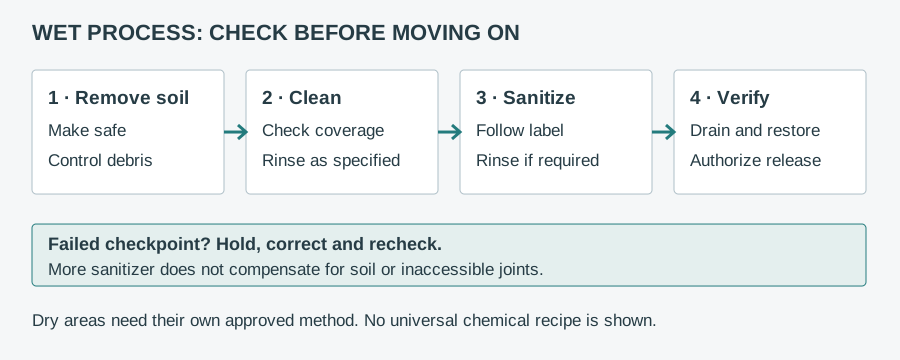
The following is a planning sequence, not chemical instructions. QA, the cleaning-chemical supplier and the equipment manufacturer must agree the process, compatibility, evidence and acceptance criteria for the actual food, soil, hazard and assembly. No universal sanitiser, dose or exposure time is prescribed.
- Contain and make safe. Follow product-hold and line-isolation procedures. Protect adjacent equipment, packaging and accepted clean areas. Decide sampling and evidence needs before disturbing the suspect location.
- Locate the retention mechanism. Identify the actual interface, trapped moisture, damaged seal or missing cleaning access. Record photographs, point references and recent maintenance changes. Avoid equating the nearest positive swab with the only source.
- Expose the surface through approved access. Remove specified covers or parts safely; account for components. Protect lubricated interiors and electrical equipment. If access requires an unapproved modification, stop and involve the machine builder.
- Remove deposits using the agreed cleaning method. Apply specified chemistry and mechanical action with tools suitable for the surface. Reach the niche itself. Do not use abrasive damage as a substitute for removal, and do not mix chemicals or improvise neutralisation.
- Repair the cause where necessary. Replace damaged compatible seals, correct inaccessible joints or arrange qualified surface repair. Inspect pits before choosing stronger chemistry; the related cleaner-exposure corrosion diagnostic guide separates metal damage from cleaning failure.
- Apply the approved microbial-control treatment. Follow the exact chemical label and site procedure, including treatment and rinse requirements. Thermal treatment requires assembly-specific approval too; neither heat nor sanitiser compensates for retained deposits.
- Restore, verify and authorise release. Check part accountability, seal seating, drainage and guarding. Complete hazard-appropriate inspections and testing, retain failures and follow-up evidence, and obtain the required release decision. Continue the approved point-level follow-up after restart.
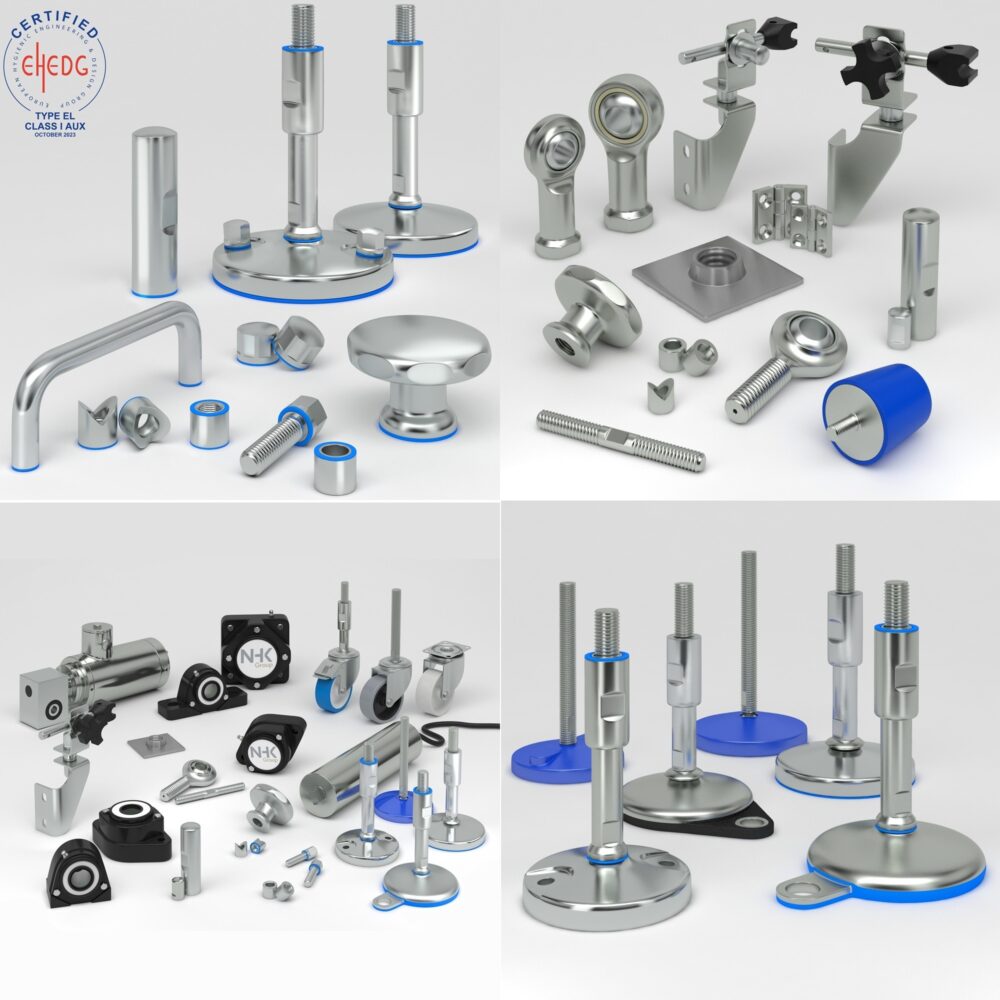
If the location cannot be cleaned and verified through a defensible procedure, repeated treatment is not a durable solution. Assess replacement or redesign. NHK lists stainless hygienic component families for interface redesign; category availability is not evidence that a proposed item removes biofilm or controls Listeria.
Biofilm prevention: design, maintenance and acceptance checks
Prevention combines accessible geometry, compatible materials, controlled cleaning and condition monitoring. Reject installation details that create unassessed gaps or standing liquid. Specify inspectable joints and repeatable reassembly, with cleaning access maintained around neighbouring parts. A self-draining surface only drains if the installed orientation and surrounding interfaces permit it.
Inspect seals for cracking, swelling and lost contact; inspect welds and surfaces for defects that retain deposits. Restore specified joints rather than applying an improvised sealant bead. Review changes to products, chemicals, cleaning frequency or component duty through change control. Set maintenance intervals from risk, condition and manufacturer instructions, not an invented calendar rule.
The related reliability cluster's bearing failure evidence and washdown checks helps when leakage or corrosion accompanies a hygiene finding. NHK's sealed bearing configurations for mounting-joint review are a secondary product route. Check exact-item sealing, servicing and installation documents; a sealed bearing interior does not prove its exterior joint is cleanable.
Example: recurrence behind a conveyor cover
Example — hypothetical assumptions, not NHK field data. A wet-cleaned conveyor has recurring microbiological findings near a removable cover. Its visible panels pass inspection; the back-face cleaning requirement and seal condition are uncertain. No organism identity, confirmed biofilm or successful repair is assumed.
Preserve the location and method history, then safely inspect the cover and mating face under the investigation plan. Check retained deposits, seating and cleaning access alongside possible transfer from tools or nearby equipment. If redesign is proposed, revise the cleaning boundary and prove the required outcome with agreed evidence. Do not declare clearance because a replacement looks smoother.
Specification and enquiry: send the niche, exposure and evidence
Copy and complete: “Component designation, drawing reference and quantity: __. Product-contact/splash/non-contact zone: __. Product, soil and relevant hazard: __. Recurring finding location and sampling evidence: __. Cleaning method, access and removal procedure: __. Chemical identity, concentration, temperature, time, rinse and frequency: __. Seal compound, joint condition, orientation and drainage: __. Load, speed and duty: __. Required material, food-contact and exact-design documents: __. Delivery country: __.”
Send these details to NHK
Use the buyer’s application and component-document guides to organise the request. NHK can assess the component interface, suggest parts and prepare a quote; QA and the cleaning supplier own the removal process and release evidence. EHEDG certifies specific equipment designs; 3-A Symbol authorisation follows Third Party Verification. Both are voluntary and neither certifies a biofilm-free plant.